

Making a recipe from scratch comes down to five moves: ideate, draft, test, write, and share. Pick an idea worth chasing, sketch a working draft with real quantities, cook it two to four times while taking notes, write the final card in clear language, then get it in front of another cook. Home cooks and aspiring recipe developers can follow this exact sequence, whether the goal is a weeknight pasta or a layer cake meant for a blog.
TL;DR:
- Proper recipe development involves multiple testing rounds, with each iteration requiring careful tasting and precise note-taking to ensure reliability.
- Testing a recipe on different equipment helps confirm it works consistently across various kitchens, especially considering oven calibration and pan material differences.
- Clear, detailed recipe cards with specific instructions, ingredient order, timing cues, and substitutions are essential for others to replicate results accurately.
- Substituting ingredients should focus on function rather than flavor alone, especially when adjusting for dietary needs or ingredient availability.
- Good food photography relies on natural light, appropriate angles, and intentional garnishing to make recipes visually appealing and trustworthy.
Table of Contents
- How Do You Make a Recipe From Scratch?
- Where Do Good Recipe Ideas Actually Come From?
- How Do You Write a Working First Draft?
- How Many Times Should You Test a Recipe?
- What Makes a Recipe Card Easy to Follow?
- How Do You Adjust a Recipe for Diets, Tools, or Batch Size?
- What Do Wine Drop Cookery and Alan Bring to Recipe Development?
- What Safety and Hygiene Rules Matter Most While Testing?
- How Do You Handle Nutrition and Dietary Information?
- Why Should You Test a Recipe on Different Equipment?
- What Makes a Recipe Photo Worth Sharing?
- Who Are You Actually Writing the Recipe For?
- When Should You Hire a Developer Instead of Testing Solo?
- What Gear Actually Helps While You Test Recipes
- Sources
- FAQ
How Do You Make a Recipe From Scratch?
Every original recipe you’ll ever eat came from someone following roughly the same five stages, whether they knew it or not. You can borrow that structure without needing a culinary degree or a test kitchen.
- Ideate. Pick a dish based on a craving, a pantry surplus, or a technique you want to practice. This is where you decide what problem the recipe solves, like “I want a one-pan dinner” or “I want a lighter version of my grandmother’s pie.”
- Draft. Write down a rough ingredient list and method before you touch a burner. This forces you to think through ratios and order of operations while it’s still cheap to make changes.
- Test. Cook the draft, taste at every stage, and write down exactly what you’d change. This is where a decent idea becomes a reliable one.
- Write. Turn your notes into a clean, step-by-step recipe card that someone else could follow without you standing next to them.
- Share. Hand it to a second cook, photograph it, or publish it, and treat any feedback as data for round two.
A quick example: an idea for “garlicky greens with white beans” moves from a fridge-cleanout thought (ideate) to a scribbled list of olive oil, garlic, kale, and cannellini beans with rough amounts (draft), to three stovetop tests adjusting garlic and acid (test), to a finished card with exact measurements and a doneness cue for the greens (write), to a photo and a friend’s feedback (share). Baking recipes usually need tighter measurements and more test rounds than stovetop dishes, since a few grams of flour can shift a cake’s texture in ways a splash of extra broth never would in soup.
Where Do Good Recipe Ideas Actually Come From?
Strong recipes rarely start from nothing. They start from a source, then get filtered through a structure that tells you whether the idea is worth testing.
Good inspiration sources include:
- Your own pantry, especially ingredients you’re trying to use up before they expire.
- Classic dishes you can riff on, like a béchamel or a tomato sauce base.
- Restaurant dishes you want to reverse engineer at home.
- Seasonal produce that’s cheap and abundant right now.
- Your personal “flavor bank,” the combinations you already know work from experience.
Once you’ve got a direction, look at the dish’s underlying structure rather than starting from zero. Swapping components inside a proven framework, sometimes called schema swapping or flavor-matrix thinking, reduces aimless experimentation and produces more balanced results than pure improvisation. A shrimp scampi, for instance, is really just “protein plus garlic, butter, wine, and acid over starch.” Swap the shrimp for chicken and you’ve got a new dish built on a framework that already works.
Before you draft anything, check two or three reliable recipes in the same category for ratios and technique cues. A classic Sauce Tomate is a good benchmark for acid-to-fat ratios in tomato-based dishes.
Pro Tip: Keep a running note on your phone of flavor pairings that surprised you at restaurants or in other people’s cooking. That list becomes your personal flavor bank, and it will save you dozens of failed first drafts over time.
How Do You Write a Working First Draft?
A working draft isn’t the finished recipe. It’s a functional document that keeps your testing organized so you’re not relying on memory between attempts.
- List ingredients in the order you’ll use them, not alphabetically or by category. Writing an original recipe means the list should read like a preview of the method itself.
- Note the state of each ingredient, including whether it’s divided across steps. “2 cups shredded cheddar, divided” tells a cook exactly what to expect before they start.
- Record the ratio you’re working from, especially for baking, sauces, or dressings, so you can scale or troubleshoot later without guessing.
- Estimate yield and time even roughly. A placeholder like “serves 4, about 40 minutes” gives your testing a target to measure against.
- List every piece of equipment, and note a hand-method alternative where one exists, since not every tester will own a stand mixer or an immersion blender.
Professional developers treat this draft as disposable and expect to rewrite it multiple times. One Food52 recipe developer describes drafting before cooking and testing repeatedly, revising the written recipe alongside every kitchen attempt rather than after the fact. If you’re building something with several components, like a sauce that needs to be made separately and folded in later, a classic Béarnaise is a useful model for how to structure a multipart draft cleanly.
How Many Times Should You Test a Recipe?
Most simple stovetop or oven dishes need a few test rounds before they’re reliable. Pastry, bread, and anything relying on precise chemical reactions usually need more, since small changes in ratio or temperature show up as visible failures rather than mild flavor shifts.
Each test round should include a structured tasting schedule, not just a bite at the end:
- Raw or unmixed: taste individual components before they’re combined or cooked, so you know their baseline.
- Mid-cook: taste at a key transition point, like right after a sauce reduces or a dough finishes its first rise.
- Finished: taste the completed dish, ideally after it’s rested for a few minutes, since flavors often shift as things cool.
This staged approach builds what culinary educators call a “flavor bank.” Chef Pietro Vitelli, quoted in an Escoffier School piece on recipe development, emphasizes tasting ingredients in different states to understand how flavor layers actually develop, rather than guessing at interactions after the fact.
After each test, write down specific adjustments, not vague impressions. “Too salty” isn’t useful. “Reduce salt from 1 teaspoon to ½ teaspoon and add it in two additions instead of one” is something you can act on next round.
Pro Tip: Test the same recipe on two different days, not back to back. Fatigue changes your palate, and a dish that tasted perfect at 8 PM after a long cooking session might read differently with fresh taste buds the next morning.
What Makes a Recipe Card Easy to Follow?
A recipe card’s only job is to let a stranger reproduce your results without you in the room. That means every ambiguous word or missing detail is a place where someone else’s dinner can go wrong.
Start with the ingredient list. Use consistent units, whether that’s the imperial cups and tablespoons most American home cooks expect or metric weights for baking precision, and order every item to match the sequence it appears in the method. If an ingredient gets used twice, split it in the list itself: “1 cup butter, divided” tells the cook to expect two separate additions before they even start reading steps.
The method itself needs a different discipline. WikiHow’s detailed breakdown of recipe writing recommends imperative verbs (“Whisk,” “Fold,” “Sear”) over passive descriptions, along with short steps that cover one action each. Pair every time estimate with a visual or sensory cue, since ovens and stovetops vary: “Bake 25 to 30 minutes, until the edges pull away from the pan and a toothpick comes out clean” is far more reliable than “bake until done.”
For recipes with multiple components, like a cake with a filling and a glaze, organize each part under its own labeled subheading rather than blending everything into one long list. Note substitutions inline, right where they’re relevant, instead of burying them in a footnote nobody reads.
| Recipe card element | Rule of thumb |
|---|---|
| Ingredient order | Match the order of use in the method |
| Units | Pick one system (imperial or metric) and stay consistent |
| Divided ingredients | Specify quantity per use, not just total |
| Time cues | Pair every time with a visual or sensory doneness sign |
| Multipart recipes | Separate components under their own subheadings |
| Yield and storage | State servings, prep and cook time, and storage guidance |
Recipes that include yield, timing, and storage directions alongside serving suggestions tend to get reused more, simply because they answer the questions a cook asks before they even start shopping.
How Do You Adjust a Recipe for Diets, Tools, or Batch Size?
Substitutions work best when you replace an ingredient for the function it performs, not just its flavor. If a recipe relies on eggs for structure in a baked good, a flax egg or extra binder can stand in. If eggs are there purely for richness in something like a custard, the substitute needs to solve a different problem entirely.
- Swap for function first: ask whether the ingredient provides structure, moisture, fat, acid, or sweetness before picking a replacement.
- Scale simple ratios (soups, marinades, dressings) with basic math, since doubling liquid-heavy dishes rarely causes problems.
- Retest anything baked or emulsified when you scale it, since pan size, oven heat distribution, and mixing time don’t scale linearly.
- Watch for the usual failure modes: over-salted (fix with acid or a starchy addition, not more salt), tough proteins (usually overcooked or under-rested), and underset sauces (often needs more reduction time, not more thickener).
A recipe built for gluten, dairy, or allergen-free eaters needs its own testing pass rather than a guess, since one swap often triggers a second problem elsewhere in the dish.
What Do Wine Drop Cookery and Alan Bring to Recipe Development?
Wine Drop Cookery’s guides and gear exist because reliable tools remove variables from testing, letting you isolate whether a flaw is technique or equipment. Alan’s companion piece, How To Cook for Beginners, walks through a similar staged tasting process on a simple weeknight dish, confirming a change works before writing it down as a rule. That habit, test first, then write, is the backbone of every method in this guide.
What Safety and Hygiene Rules Matter Most While Testing?
Recipe testing multiplies risk simply by repetition. You’re handling raw proteins, tasting partially cooked food, and reusing prep surfaces more often than a normal cooking session, so a few habits matter more here than in everyday cooking.
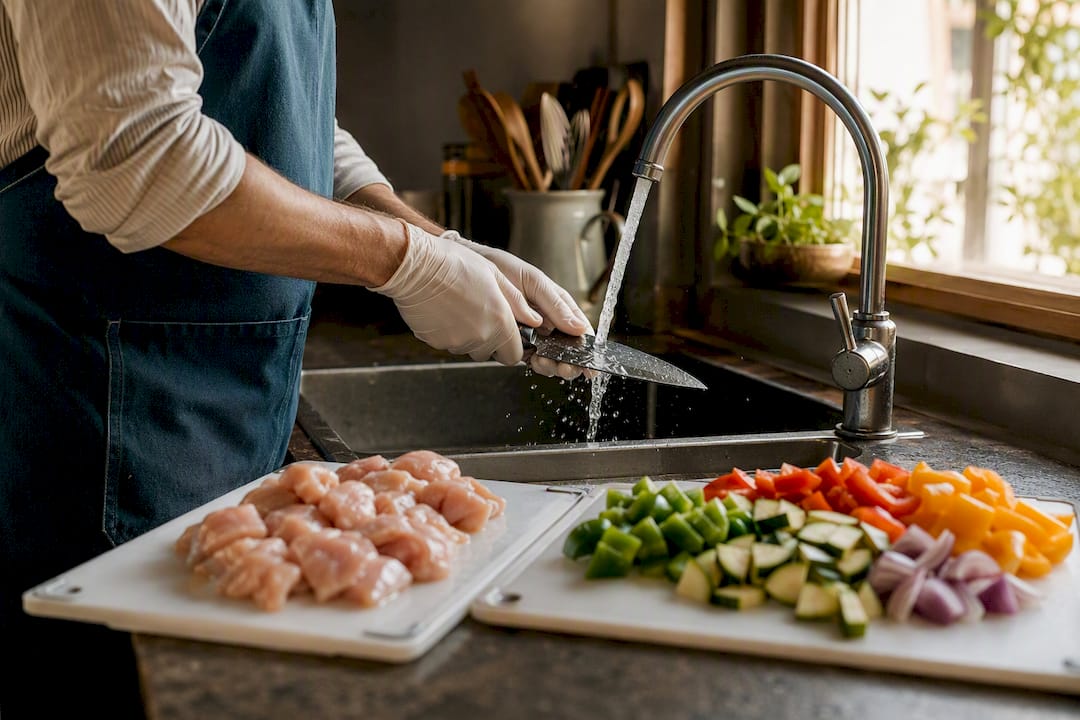
Keep raw meat, poultry, seafood, and eggs on separate cutting boards from produce, and wash hands and surfaces between handling each. If you’re tasting a dish mid-cook to check seasoning, use a clean spoon each time rather than double-dipping the one you’re stirring with; this matters even more when you’re testing a recipe multiple times in one session, since bacteria from an earlier taste can carry into a later ingredient addition. Never taste raw batter or dough containing eggs or uncooked flour, since both carry a real risk of foodborne illness. Cool and refrigerate test batches promptly instead of leaving them at room temperature between rounds, especially with dairy-based sauces or anything containing meat.
Label your test batches with the date and version number if you’re keeping leftovers in the fridge for a side-by-side taste comparison later. It’s easy to lose track of which container came from which test when you’re running three variations of the same sauce in one afternoon. Any recipe involving fermentation, canning, or curing needs research into safe acidity and temperature thresholds before you improvise, since these categories carry genuine safety risks that a “taste and adjust” approach can’t catch. When in doubt on a preservation technique, defer to established food-safety guidance rather than intuition.
How Do You Handle Nutrition and Dietary Information?
Readers increasingly expect at least basic nutritional context, especially for recipes marketed toward specific diets like low-carb, high-protein, or diabetic-friendly eating. You don’t need a nutrition science background to provide useful information, but you do need accuracy.
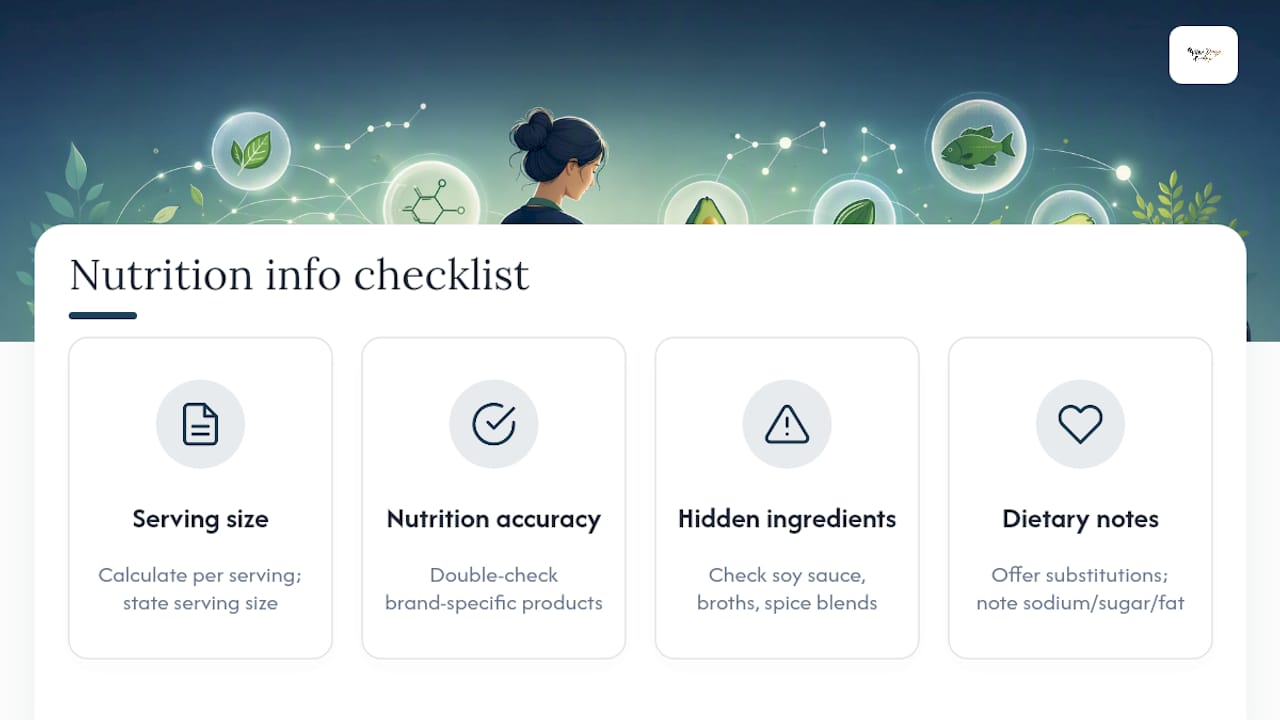
If you’re publishing a recipe with nutritional data, calculate it per serving, not per batch, and state your serving size clearly next to the numbers. Free nutrition calculators can estimate calories, protein, carbohydrates, and fat from your ingredient list, but double-check unusual ingredients or brand-specific products, since generic database entries sometimes miss added sugars or sodium in processed items.
Dietary labeling needs the same precision as ingredient lists. “Gluten-free” means every ingredient, including soy sauce, broth, and spice blends, has been checked for hidden gluten, not just the obvious flour. The same goes for vegan, dairy-free, or nut-free claims: cross-contamination and hidden ingredients (fish sauce in a “vegetarian” dish, whey powder in a spice mix) trip up even careful cooks. If you’re not fully certain a recipe meets a dietary claim, say “can be made gluten-free with X substitution” rather than labeling the original version something it isn’t.
For readers managing specific health conditions, a simple note about where sodium, added sugar, or saturated fat sits in the recipe helps them decide whether it fits their needs without you making medical claims you’re not qualified to make.
Why Should You Test a Recipe on Different Equipment?
A recipe that works flawlessly in your kitchen can fail in someone else’s for reasons that have nothing to do with their skill. Oven calibration alone can vary by 25 degrees or more between units, and gas versus electric stovetops heat pans at meaningfully different rates.
If you’re serious about a recipe holding up beyond your own kitchen, test it on at least one different piece of equipment, a different oven, a different brand of pan, a different stovetop type, before calling it final. Nonstick versus stainless steel pans change browning behavior significantly, and a recipe written for a heavy enameled Dutch oven may cook faster or slower in a thin aluminum pot.
Ingredient brands matter too, more than most home cooks assume. All-purpose flour varies in protein content by brand and even by region, which affects how much liquid a dough absorbs. Canned tomato brands differ in acidity and sugar content enough to shift a sauce’s balance. If a recipe depends on a specific brand behaving a certain way, either say so explicitly or test with two or three common brands to confirm the results hold across all of them.
This is where handing your written draft to a second cook earns its value. A Food52 developer’s account of recipe testing describes soliciting a cook who hasn’t seen the dish before, since a fresh set of hands on unfamiliar equipment exposes gaps in your instructions that you’d never notice cooking it yourself for the fifth time.
What Makes a Recipe Photo Worth Sharing?
A recipe can be flawless on the plate and still get scrolled past if the photo doesn’t sell it. Natural light does more work than any camera setting: shoot near a window during the day rather than under overhead kitchen lighting, which tends to cast a yellow tint that makes food look less appetizing than it actually is.
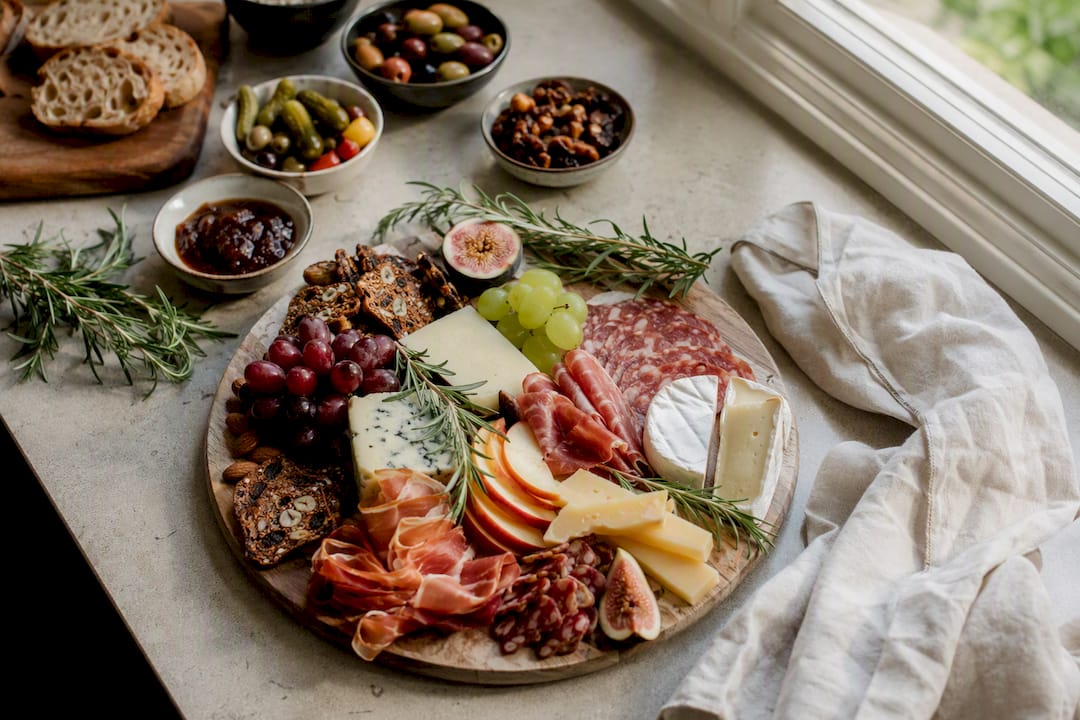
Angle depends on the dish. Shoot flat-lay, straight down, for dishes with interesting texture spread across a plate, like a grain bowl or a pizza. Shoot at a 45 degree angle for anything with height, like a stacked sandwich or a slice of layer cake, so the camera captures the layers instead of flattening them into a single line.
Garnish with intention, not decoration for its own sake. A scattering of fresh herbs, a drizzle of sauce, or a wedge of citrus should hint at a flavor actually present in the dish, not just fill visual space. Steam and condensation read as freshness in a photo, so shoot hot dishes immediately rather than letting them sit while you fuss with the styling.
Keep the background simple. A plain surface, a linen napkin, or a wooden board usually beats a cluttered countertop, since viewers’ eyes should land on the food first. If you’re sharing the recipe publicly, take one photo of the finished dish and, if possible, one process shot showing a key step, since process images build trust that the recipe actually works as written.
Who Are You Actually Writing the Recipe For?
Every recipe implicitly picks an audience, whether you state it or not, and mismatched expectations are one of the most common reasons a “clear” recipe still confuses readers. A recipe written for a confident weeknight cook can skip explaining what “sauté” means. A recipe aimed at total beginners, or written for a curious kid in the kitchen, needs that same term either explained or replaced with plainer language like “cook, stirring, until soft.”
Consider who’s actually going to attempt the dish. A 12 year old cooking independently can generally handle simple assembly, no-bake desserts, scrambled eggs, or quesadillas, but shouldn’t be left alone with deep frying, sharp knife work beyond basic slicing, or anything requiring precise temperature judgment on a stovetop. If you’re writing recipes aimed at younger or less experienced cooks, flag any step that needs adult supervision explicitly rather than assuming it’s obvious.
Readability matters as much as content. Short sentences, one action per step, and consistent terminology throughout the recipe reduce the cognitive load on someone who’s following along while their hands are busy and their phone screen keeps timing out. If you use a less common technique or ingredient, define it briefly the first time it appears rather than assuming familiarity. Matching your vocabulary and step complexity to your actual audience, not to how experienced you personally are, is what separates a recipe people finish from one they abandon halfway through.
When Should You Hire a Developer Instead of Testing Solo?
DIY testing works fine for personal recipes and most blog content, where a handful of test rounds and one fresh-cook check are enough. Hiring a professional developer makes more sense for cookbook manuscripts, restaurant menu items, or packaged food products, where consistency across hundreds of kitchens and strict nutritional accuracy actually matter.
If you’re weighing that decision, ask whether your project needs to work identically everywhere or just work well in your own kitchen. For the latter, keep testing yourself. Once you’re ready to publish something people will cook without your guidance, revisit the pantry essentials guide to make sure your ingredient list matches what most home cooks realistically have on hand.
— Alan
What Gear Actually Helps While You Test Recipes
A good knife won’t fix a bad ratio, but it will make every single test round faster and more consistent, and consistency is the entire point of testing. Wine Drop Cookery’s professional chef knife sets keep your cuts uniform across test rounds, which matters more than it sounds like when you’re comparing whether a smaller dice changed how a sauce reduces.
Beyond knives, a 15-piece stainless steel utensil set covers most of the hand-method alternatives mentioned earlier in this guide, whisking, folding, straining, without requiring a full appliance lineup. For bakers running multiple pastry tests in a week, a reliable stand mixer removes mixing-time variability from your results entirely, and Wine Drop Cookery’s digital cookbooks offer technique-driven recipes you can benchmark your own drafts against before you commit to a final version. None of this replaces disciplined testing. It just removes the equipment guesswork so your notes reflect the recipe, not the tool. Browse the kitchen essentials collection to build out a testing kit that won’t introduce variables you didn’t account for.
Sources
For deeper reading on professional workflows, see Food52’s account of inventing recipes for a living, the Institute of Culinary Education’s recipe-writing breakdown, and Escoffier’s piece on a chef’s creative process. For pantry planning specific to a cuisine, TOJ Express’s Caribbean pantry checklist is a solid model.
- Inside a Chef’s Mind: The Process Behind Creating New Dishes
- I Invent Recipes for a Living—Here’s How
- Learning to Write an Original Recipe
- How Do You Write A Recipe?
FAQ
How do you make a recipe step by step?
Ideate an idea, draft it with real quantities and ordered ingredients, test it two to four times while tasting and taking notes, then write the final card using imperative verbs and clear doneness cues.
How do you make simple recipes at home?
Start with a familiar structure, like a sauce or a one-pan format, swap in ingredients you already have, and taste at each stage before writing down what worked.
What can a 12 year old cook at home?
Simple assembly dishes, no-bake desserts, scrambled eggs, and quesadillas are generally appropriate for a 12 year old cooking independently, while frying and precise stovetop temperature work should have adult supervision.
What are some easy recipes I can make?
Sauces built on classic ratios, like a béchamel or a tomato sauce, are easy starting points because the structure is proven and you’re only adjusting flavor, not technique.
How many times should I test a recipe before publishing it?
Most simple dishes need two to four test rounds, while baking and pastry recipes typically need more since small ratio changes affect the outcome more visibly.
Recommended
- Best Chicken Dishes Recipes for Every Home Cook – Wine Drop Cookery
- Chicken Cooking Essentials for Home Cooks: Safe, Juicy Results – Wine Drop Cookery
- Chicken Cooking Essentials for Home Cooks Safe Juicy Results – Wine Drop Cookery LLC
- Best Chicken Recipes for Home Cooks Who Love Great Food – Wine Drop Cookery
0 comments