

Unplug your juicer, pull apart every removable piece, and rinse it under running water before pulp has a chance to dry. If your model allows it, run a quick water flush through the chute while the motor is still off. Empty the pulp container right away. Do that in the first 60 seconds, and the five-minute daily routine below will always be enough. Skip it, and you’re heading straight for a deep-clean soak.
TL;DR:
- Rinsing components immediately after juicing prevents pulp from drying and reduces the need for deep cleaning, especially for sticky or sugary residue.
- Daily cleaning involves disassembling, rinsing, and lightly scrubbing with a soft brush, with more intensive soakings reserved for buildup or stubborn stains every few months.
- Use gentle, food-safe cleaning agents like baking soda, vinegar, or citric acid, and avoid harsh chemicals or abrasive tools that can damage mesh filters or plastic parts.
- Choose juicers with simple basket designs and fewer crevices to reduce cleaning time and wear, especially when shopping for a new machine.
- Proper drying and storage practices are essential to prevent mold growth; air-dry parts upside down and store them loosely in a well-ventilated area.
Table of Contents
- Why Cleaning Your Juicer Matters More Than You Think
- The 5-Minute Daily Juicer Cleaning Routine
- How to Deep Clean a Juicer and Remove Buildup
- Cleaning Tips by Juicer Type: Centrifugal, Masticating, and Citrus
- Getting Turmeric, Beet, and Carrot Stains Out
- Safe Cleaners for Juicers (and What to Skip)
- Drying, Storage, and When to Replace Parts
- What I’ve Learned About Juicer Care That Most Guides Miss
- Where to Find the Right Cleaning Tools and Parts
- Sources
- FAQ
Why Cleaning Your Juicer Matters More Than You Think
Leftover pulp isn’t just messy. It’s damp, sugary, and sitting at room temperature, which makes it a decent breeding ground for bacteria and mold within hours. Dried residue also clogs the mesh filter, forcing the motor to work harder on your next batch and shortening the life of the parts that spin fastest.
The CDC’s guidance on handling fresh produce reminds us that fruits and vegetables carry bacteria before they ever touch your kitchen, so equipment that processes them needs the same care you’d give a cutting board. A juicer you rinse right away also tastes cleaner on the next use, with no lingering carrot or beet funk in your morning greens. Five minutes now beats forty minutes of scrubbing dried gunk out of mesh later.
The 5-Minute Daily Juicer Cleaning Routine
You don’t need a special occasion to keep your juicer spotless. You need a routine you’ll actually stick to, and this one takes less time than it takes to drink the juice you just made.
- Power down and unplug first. Never brush or rinse near the base while it’s connected.
- Disassemble every removable part immediately: the pulp basket, strainer, lid, and pusher.
- Rinse under running water right away, before pulp dries onto the mesh. Warm water works for most residue, but see the vegetable-specific tip below.
- Run a quick water flush through the chute if your model supports it. This trick, common across brand cleaning guides, loosens residue clinging to internal walls without any disassembly.
- Scrub the mesh filter with a soft juicer brush, working in small circles rather than pressing hard in one spot.
- Wipe the motor base with a damp cloth only. Never submerge it.
- Air-dry or towel-dry, then reassemble or store the parts separately.
Most plastic components (baskets, lids, pushers) are dishwasher-safe on the top rack, but check your manual first since heat can warp thin plastic over repeated cycles. Pre-rinse anything that goes in the dishwasher so pulp doesn’t bake onto the mesh during the dry cycle.
A couple of shortcuts make busy mornings painless. Line the pulp bin with a small compostable bag before you start juicing, and lift the whole thing out in one motion when you’re done. Save usable pulp for muffins or veggie broth instead of scraping it straight into the trash.
Pro Tip: Keep your juicer brush sitting in a cup near the sink, not buried in a drawer. If it’s not visible, you won’t reach for it, and that’s how five-minute cleanups turn into weekend deep-cleans.
How to Deep Clean a Juicer and Remove Buildup
A daily rinse handles fresh pulp, but mineral deposits, sugar film, and hardened residue need a stronger approach every so often. Most manufacturer guides, including Kuvings’ deep-clean instructions, recommend a full soak every 2 to 3 months, or every few weeks if you juice daily with hard, fibrous produce like carrots and beets.
Three soak recipes cover almost everything:
- Citric acid soak: Dissolve 1 to 2 tablespoons of citric acid in a quart of warm water and soak plastic parts for 15 to 20 minutes. It cuts mineral deposits and brightens cloudy plastic without harsh chemicals.
- Vinegar soak: Mix equal parts white vinegar and warm water for stubborn buildup or hard-water spots. Rinse thoroughly afterward so no vinegar smell carries into your next juice.
- Baking soda paste: For spot treatment on stains, mix baking soda with a little water into a paste and rub gently with a soft brush.
For caked-on pulp, a warm (not hot) soapy soak rehydrates the fibers first. Follow with gentle circular brushing rather than scraping, which protects the mesh from tears. One caution worth repeating: the motor base never goes in water, soak or otherwise, no matter how tempting it is to dunk the whole unit.
Baking soda’s cleaning power isn’t just kitchen folklore, either. A lab study found sodium bicarbonate showed measurable virucidal effects on food-contact surfaces under controlled conditions, which supports its use as a mild, food-safe scrubbing agent, even if it’s not a substitute for a true disinfectant.
Cleaning Tips by Juicer Type: Centrifugal, Masticating, and Citrus
Not every juicer cleans the same way, and using the wrong technique on the wrong machine either wastes time or wears down parts faster than it should.
- Centrifugal juicers respond well to the pulse-rinse trick: run a splash of water through while pulsing briefly to knock loose pulp off the spinning basket. Sugar-heavy juices like apple or pineapple dry fast on these baskets, so don’t let them sit even ten minutes.
- Masticating (cold-press) juicers have auger threads and small gaskets that trap fibrous strands. Brush these threads individually rather than rinsing and hoping. For starchy vegetables like carrots and beets, start with cold water. Hot water can cause the starch to set and bond to the mesh instead of rinsing free.
- Citrus and handheld juicers disassemble in seconds, but check whether yours runs on a battery or has an electric base before you get near the sink. Small parts brushes make short work of citrus pulp caught in the reamer grooves.
Whatever type you own, confirm which parts are dishwasher-safe in the manual before you toss anything in. Manufacturers like Breville note that the included soft brush is designed specifically for filter mesh, and swapping it for a stiffer brush risks tearing the fine weave.
Getting Turmeric, Beet, and Carrot Stains Out
Turmeric is the worst offender here. Its pigment binds to plastic almost instantly, and a quick rinse won’t touch it. Beet and carrot stains are milder but follow the same fixes.
- Baking soda paste applied directly to the stain and left for a few minutes before scrubbing lifts most surface discoloration.
- Citric acid or lemon juice soaks work as a mild bleaching agent, brightening plastic that’s gone dull orange or pink after repeated use.
- Vinegar soaks double as both a stain lifter and mineral-deposit remover, though you’ll want to rinse thoroughly afterward to clear the smell.
Stubborn turmeric stains sometimes need two or three repeat soaks over a few days rather than one aggressive scrub. If a part still looks discolored after several attempts and has developed a rough or pitted surface, it’s worth replacing rather than continuing to soak, since a damaged surface holds onto pigment even harder.
Safe Cleaners for Juicers (and What to Skip)
Stick to mild dish soap, white vinegar, citric acid, and baking soda for nearly every juicer cleaning job. These four cover degreasing, deodorizing, and mineral removal without introducing anything you’d worry about touching food.
- Skip bleach on food-contact parts unless your manufacturer explicitly says it’s safe. Research on home disinfectants and natural antimicrobial products shows effectiveness varies widely by formulation, so a stronger chemical doesn’t automatically mean a safer clean.
- Avoid steel wool and metal scrapers, which scratch mesh and plastic, creating grooves where bacteria and stains hide.
- Never boil plastic parts to sanitize them. Heat warps plastic and can release compounds you don’t want anywhere near your juice.
- Be cautious with strong oxidizers like persulfate-based cleaners. EWG’s ingredient database flags some of these compounds as worth limiting around food-contact surfaces.
Drying, Storage, and When to Replace Parts
How you dry and store your juicer matters almost as much as how you wash it. Damp parts stacked together are exactly the environment mold loves.
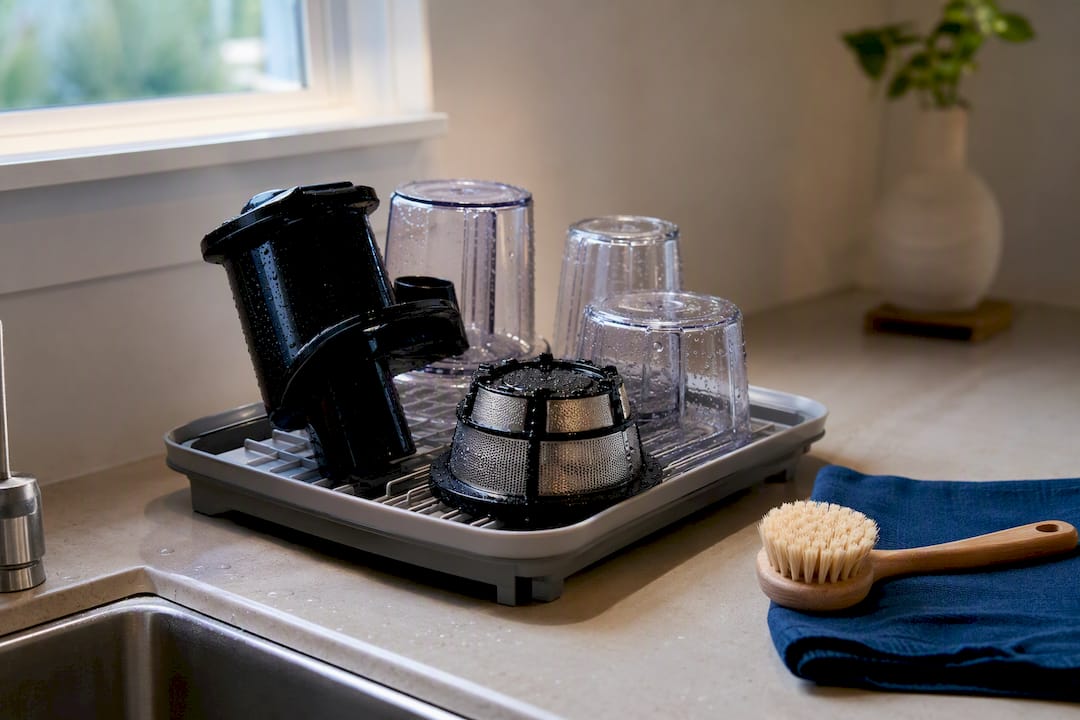
Air-dry every piece upside down on a rack so water drains away instead of pooling in corners. Store dry parts loosely in a ventilated spot, not sealed inside a container, and skip cotton towels that shed lint onto mesh filters.
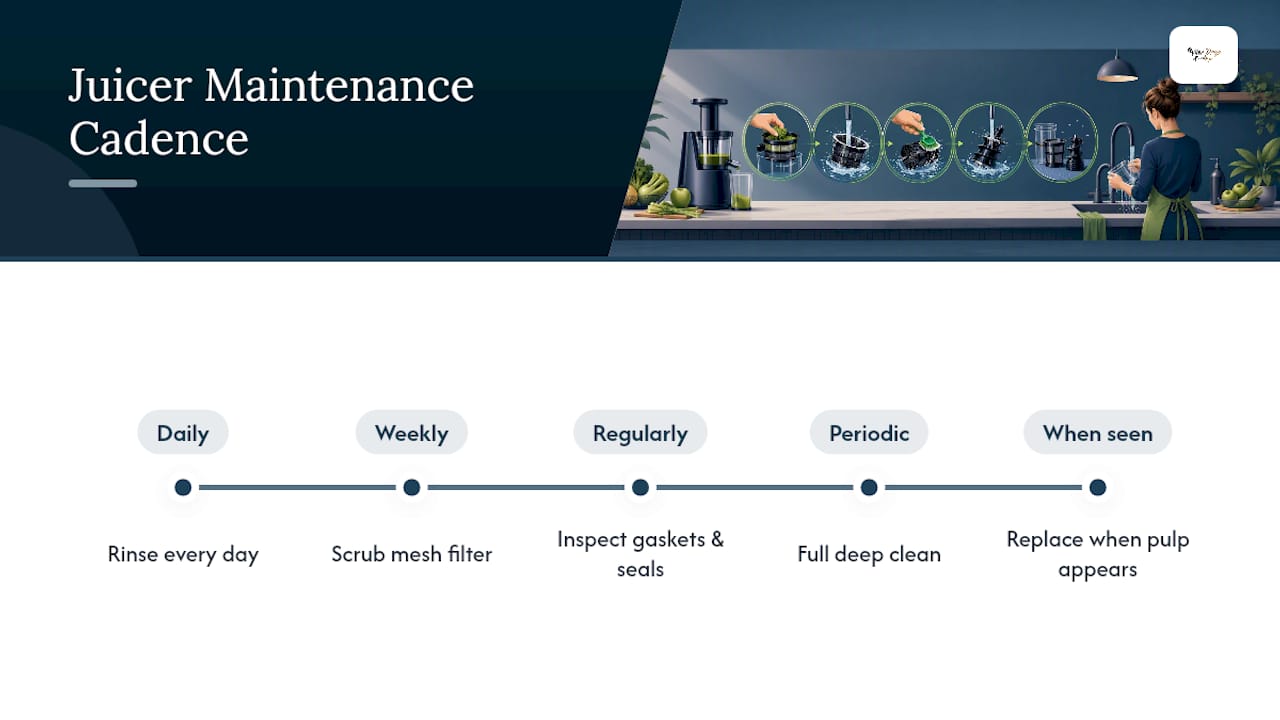
A simple calendar keeps you on track: rinse daily, give the mesh filter a proper scrub weekly, check gaskets and seals regularly, and run a full deep clean periodically. Strainers and filters wear out faster than the rest of the machine and should be replaced as needed depending on use. When a filter starts leaving visible pulp in your juice despite regular scrubbing, order an OEM replacement rather than pushing a warped screen further.
What I’ve Learned About Juicer Care That Most Guides Miss
Most cleaning advice treats every juicer the same way, and that’s where it falls short. A masticating machine with fine auger threads needs patience and a small brush, not the two-minute rinse that works fine on a centrifugal basket. Treating them identically is how gaskets crack early and mesh filters develop pinholes nobody notices until juice starts leaking around the edges instead of through them.
The bigger miss, though, is timing. Readers hunt for deep-clean recipes, citric acid ratios, and stain removers, but the single biggest factor in how much scrubbing you’ll ever need is what happens in the first sixty seconds after the motor stops. A juicer rinsed immediately rarely needs an aggressive soak. One left overnight almost always does. That’s not a hack. It’s just physics: sugar and pulp bond to plastic and mesh the longer they sit, and no soak recipe undoes that as easily as avoiding it in the first place.
If you’re shopping for a new machine, that’s also worth factoring into the decision. A juicer with fewer small crevices built into the basket design will always clean faster than one with tight gaskets and narrow channels, regardless of how good your technique is.
Alan
Where to Find the Right Cleaning Tools and Parts
Once you’ve got the routine down, having the right brush and replacement parts on hand makes the difference between a five-minute clean and a frustrating scrub session. Wine Drop Cookery’s Kitchen Essentials collection carries the small tools that make juicer maintenance painless, without the guesswork of hunting through generic hardware.

A silicone basting brush and spatula set works well for scrubbing mesh and plastic without scratching either, since silicone bristles flex around curves that a stiff nylon brush can’t reach. If you’re running a heavier-duty setup, the 11 quart stainless steel juicer and the Sharper Image Juicer-Blender Combo are both built with fewer tight crevices, which cuts real time off your cleaning routine. For dedicated replacement brushes, a cold press masticating juicer with cleaning brush included is a solid option through our partner listing.
Always double-check part compatibility against your specific model’s manual before ordering. Browse the Kitchen Essentials collection to find the brush, spatula, or combo appliance that fits your setup and get your next clean down to five minutes flat.
Sources
- Antimicrobial activity of home disinfectants and natural products against potential human pathogens: PubMed
- Virucidal efficacy of sodium bicarbonate on a food-contact surface: PubMed
- How to clean a juicer: Food Network
FAQ
Can I run water through my juicer to clean it?
Yes, on many models you can run water through the chute as a quick flush, but check your manual first since some motor bases aren’t designed for water contact near the intake.
How do I get turmeric stains out of my juicer?
Apply a baking soda paste directly to the stain and scrub gently, or soak the part in a citric acid solution; stubborn stains often need two or three repeat soaks.
How do I take apart a juicer to clean it?
Unplug the machine first, then remove the pulp basket, strainer, lid, and pusher in the order your manual specifies. Most parts separate with a simple twist or lift, no tools needed.
Can I use vinegar to clean my juicer?
Yes, a mix of equal parts white vinegar and warm water works well for mineral deposits and general buildup, but rinse parts thoroughly afterward to remove the smell.
How often should I deep clean my juicer?
Plan on a full soak every 2 to 3 months for average use, or every few weeks if you’re juicing daily with fibrous produce like carrots and beets.
0 comments