

Table of Contents
- How to Sharpen Kitchen Knives: The Fundamentals
- Sharpening vs. Honing a Knife: Know the Difference
- How to Sharpen a Knife with a Whetstone
- How to Use a Honing Rod for Edge Retention
- How Often to Sharpen Kitchen Knives
- Repairing Damaged Edges: Chips, Nicks, and Serrations
- Essential Safety Gear and Pressure Control
- Conclusion: Maintaining a Razor-Sharp Edge
- Frequently Asked Questions
Last Updated: October 21, 2026
How to Sharpen Kitchen Knives: The Fundamentals
Learning how to sharpen kitchen knives is the single skill that separates a frustrated cook from a confident one.
Sharpening is the process of grinding away metal to form a fresh, keen edge. It differs from honing, which only straightens an edge that has bent. Two facts govern everything that follows: the angle of the edge and the hardness of the steel.
Understanding Blade Geometry and Steel Hardness (HRC)
Blade geometry is the shape of the edge itself, and it decides how a knife cuts and how long it stays sharp. Western kitchen knives usually carry a bevel of about 15 to 20 degrees per side.
Steel hardness is measured on the Rockwell C scale, written as HRC.
- Softer steel (around 54-56 HRC): rolls and dents before it chips. Easy to restore.
- Harder steel (58-62 HRC): holds an edge longer but chips if you twist it.
- Carbon steel: takes a keen edge fast, but rusts without care.
The practical takeaway: match your sharpening angle to the steel. A steep angle on hard steel creates a fragile edge that fails fast.
Sharpening vs. Honing a Knife: Know the Difference
Sharpening and honing are not the same job, and mixing them up is the most common mistake we see. Honing realigns a bent edge; sharpening removes metal to create a new one. A honing rod straightens the microscopic bends that build up during normal cutting.

Think of it this way:
- Hone before or after each use to keep the edge straight.
- Sharpen only when honing no longer brings the edge back.
- Never use a honing rod as a sharpener. It won't remove metal, so a truly dull knife stays dull.
That distinction explains why some cooks sharpen constantly and still fight dull knives. They're fixing the wrong problem.
How to Sharpen a Knife with a Whetstone
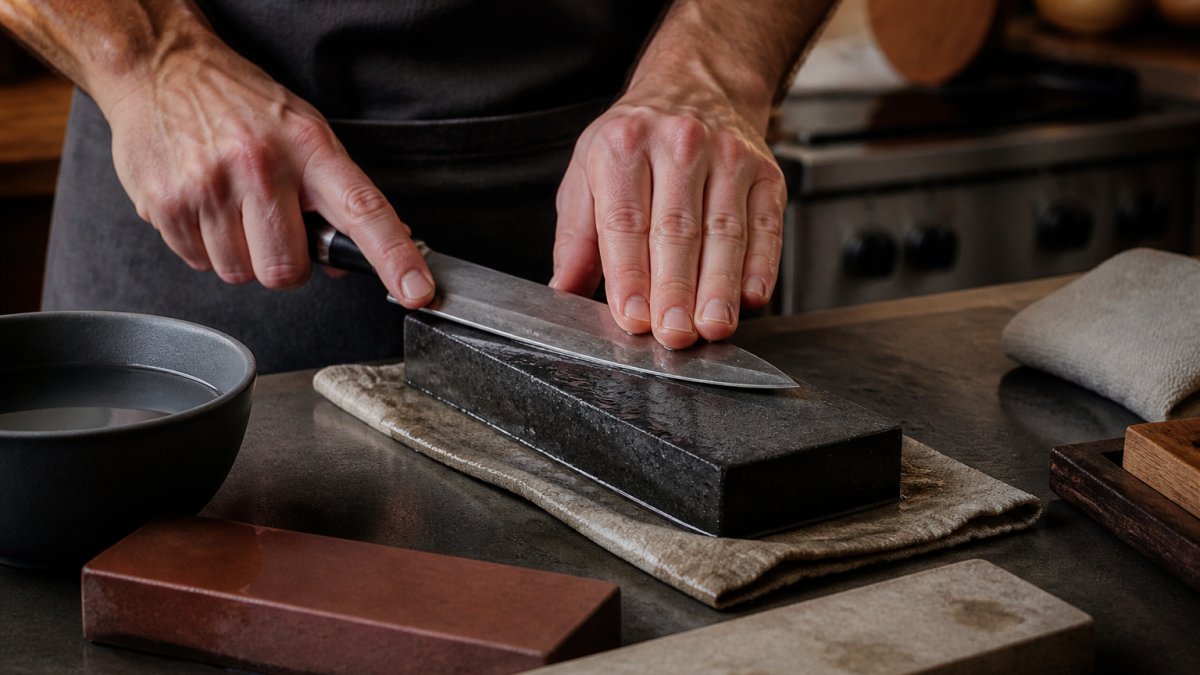
A whetstone gives you the most control and the best edge, and it's the method we recommend for anyone serious about knife maintenance. The process rewards patience over pressure.
Pick Your Grit by the Job, Not by Habit
Grit numbers tell you how aggressively a stone cuts, and the right starting point depends on the condition of the edge and the hardness of the steel.
- Coarse (roughly 220-400 grit): repairs chips, resets a bevel, and removes deep scratches. Use it only when the edge is genuinely damaged.
- Medium (roughly 800-1,500 grit): the workhorse for routine sharpening on most kitchen knives. This is where a dull-but-undamaged blade belongs.
- Fine (roughly 3,000-8,000 grit): refines and polishes. It does not create an edge; it improves one that already exists.
Match grit to steel. Softer steel in the 54-56 HRC range responds well to a medium stone and a light touch, aggressive coarse work removes metal fast and shortens blade life. Harder steel at 58-62 HRC tolerates a coarser starting point because it resists abrasion, but it also chips more readily, so inspect the edge before you commit to a low grit.
Step-by-Step: From Coarse Grit to Polishing
Follow this sequence and check your work at each stage.
- Soak the stone. Submerge a water stone for about 10 minutes until bubbles stop rising. Oil stones don't soak, apply a few drops of sharpening oil instead.
- Set the angle. Lay the blade flat, then lift the spine to your target angle (15-20 degrees per side for most Western knives, 10-15 for thinner Japanese blades). An angle guide helps here, and a marker trick works too: color the bevel with a permanent marker, take one light pass, and look at where the ink wore away. If the ink is gone only at the very edge, your angle is too steep; if it's gone across the whole bevel, you're flat.
- Start on coarse grit only if needed. Push the edge across the stone in sweeping strokes, heel to tip, keeping light, even pressure. Cover the full length of the stone so you don't hollow out the middle.
- Watch for the burr. This is the step beginners skip, and it's the one that matters most. After several passes on one side, the ground edge will push a thin ridge of metal over to the opposite side, that's the burr. You can find it three ways: drag a fingertip lightly across the edge (never along it) and feel for a slight catch; look down the edge under a bright light for a faint reflective line; or run the edge over a scrap of paper and feel it snag on one side. The burr must form along the entire length of the blade before you flip. If it only appears near the heel, keep working the tip end.
- Flip and repeat. Match the same stroke count on the other side until a burr forms there too. The goal is a burr that runs heel to tip on both sides, that's your proof the bevels meet.
- Move to fine grit. Repeat the process with lighter pressure to refine the bevel and remove coarse scratches. You're not trying to raise a big burr here; you're polishing the scratch pattern down.
- Remove the burr and strop. Finish with light edge-trailing strokes (spine leading, edge trailing) on the fine stone, alternating sides, to weaken and remove the burr. Then strop on leather or cardboard to align the edge. A burr left on the blade feels sharp but folds over on the first cut.
How to Use a Honing Rod for Edge Retention
A honing rod is your everyday tool, and using it well keeps a knife cutting longer between sharpenings. What it does is mechanical, not abrasive: the fine edge of a knife bends and rolls during normal cutting, and a rod, harder than the steel, pushes that bent edge back into line. It removes almost no metal, which is why it can be used often without wearing the blade down.
Steel Rod vs. Ceramic Rod
The two work differently, and the choice depends on your knife.
- Steel rods are the traditional choice. They realign a rolled edge with light pressure and suit softer Western steel in the 54-56 HRC range, which rolls rather than chips.
- Ceramic rods are harder and slightly abrasive. They realign and lightly refine at the same time, which makes them a better match for harder steel at 58-62 HRC. The trade-off is that a ceramic rod removes a little metal with each use, so it's closer to light sharpening than pure honing.
A hard, brittle blade honed on a steel rod with too much pressure can chip rather than straighten. If your knife is in the high-HRC range, favor a ceramic rod and a feather touch.
The Stroke
Hold the rod vertically with the tip resting on a towel, or angle it slightly away from you for more control. Place the blade near the heel at your usual angle, then draw it down and across in one smooth stroke, heel to tip. Repeat on the other side, alternating with light pressure. Five to ten strokes per side is plenty for routine maintenance.
Keep these points in mind:
Knife Sharpener and Onion Holder for Slicing, 2-Piece Set →
- Consistency beats speed. A steady angle matters more than a fast stroke. If the rod is vertical, the blade angle is the only variable, lock your wrist and move from the shoulder.
- Light pressure only. You're straightening an edge, not grinding it. Pressing hard rolls the edge further or chips it.
- Work both sides evenly. Uneven honing rolls the edge to one side, and the knife starts steering as it cuts.
When Honing Won't Help
Honing only fixes a bent edge. If the edge is genuinely dull, rounded over from wear rather than rolled, the rod has nothing to straighten, and no amount of honing will bring it back.
A quality rod gives a consistent realigning surface so the edge you already own keeps cutting the way it did on day one. Our Damascus steel honing rod is built for that daily job.
How Often to Sharpen Kitchen Knives
Most home cooks should sharpen every two to three months with regular honing in between. Heavy daily use pushes that to every four to six weeks.
Watch for the signals instead of counting days:
- The blade slides off a ripe tomato instead of biting in.
- You're pressing harder to make the same cuts.
- The edge reflects light when you look down its length.
If honing no longer restores performance, it's time to sharpen. For a fast option between stone sessions, a professional electric knife sharpener uses a built-in angle guide to put a working edge back in minutes.

Repairing Damaged Edges: Chips, Nicks, and Serrations
Damage happens, and it's fixable. Small chips and nicks come out on a coarse grit stone, where you grind back the damaged section until the edge is uniform again.
Serrations are a different job. Sharpen each tooth individually with a tapered rod, working the inside of the groove. Never drag a serrated knife across a flat stone, because it flattens the teeth.
Essential Safety Gear and Pressure Control
Safety comes down to setup and control. A stable stone and a dry grip prevent the slips that cause cuts. Keep these basics in place:
- A non-slip base or damp towel under the stone.
- A cut-resistant glove on your holding hand if you're new to stones.
- A clean, dry handle so the knife can't twist.
Pressure control is the skill that separates clean edges from damaged ones. Use firm, even pressure on the coarse grit and feather-light pressure on the fine grit.
For a low-friction entry point, our two-piece knife sharpener and onion holder set uses coarse and fine slots to rebuild an edge fast, and the holder keeps your fingers clear while you slice.

Conclusion: Maintaining a Razor-Sharp Edge
A razor-sharp edge is a habit, not a one-time fix. Hone often, sharpen on schedule, and match your angle to the steel. The cooks who struggle most are usually the ones who skipped the fundamentals.
If you want tools built to hold up to real kitchen work, Wine Drop Cookery curates restaurant-grade hardware chosen by Chef Alan after 35 years in professional kitchens.
Frequently Asked Questions
What is the golden rule for sharpening kitchen knives?
The golden rule is consistency. You must maintain a consistent blade angle on both sides of the edge. If you sharpen at 15 degrees on one side and 20 on the other, the bevel becomes uneven and the knife will not cut straight. Use an angle guide if you are learning, and always count your strokes to keep the pressure and duration balanced.
Does it matter which direction you sharpen a knife?
Yes, direction affects the burr formation. When using a whetstone, push the blade edge-first into the stone or pull it edge-trailing, but keep the motion consistent. Many chefs prefer edge-trailing strokes to minimize burr creation. For a honing rod, always run the blade down the rod at a consistent angle, alternating sides with each pass to keep the edge straight.
How do chefs keep their knives so sharp?
Chefs hone their knives daily with a honing rod to realign the edge, which prevents the blade from feeling dull. They sharpen less frequently, usually every few weeks or when honing no longer restores performance. They also wash and dry knives by hand immediately after use and store them on a magnetic strip or in a block to protect the edge from damage.
Can I use a pull-through sharpener on serrated knives?
Pull-through sharpeners are designed for straight edges. Serrated knives require a tapered rod to sharpen each tooth individually. Using a pull-through on serrations can round off the points and ruin the cutting action. For serrated blades, work the rod into each groove at the original angle, and only sharpen the flat side of the serration if the manufacturer recommends it.
Sharpening rewards consistency more than equipment. Start with one good stone or sharpener, learn your angle, and let practice do the rest. Wine Drop Cookery is here to equip your kitchen with tools that survive demanding prep and guides that teach classical technique, so you can sharpen with confidence and cut with precision.
0 comments