

Place the dinner plate in the center, forks on the left, knives and spoons on the right, water glass above the knife, and napkin either to the left of the forks or resting on the plate. The one rule that makes every setting simple, from a Tuesday dinner to a holiday table, is outside-in: guests use the outermost utensil first and work their way toward the plate as each course arrives. Set only what you’ll actually use, and the rest takes care of itself.
TL;DR:
- The outside-in rule states that diners use the outermost utensil first and work inward with each course, so setting only what will be used simplifies the process.
- For basic settings, place the plate at the center, with forks on the left, knives and spoons on the right, and glasses above the knives, leaving minimal space for clutter.
- Casual table setups add a salad fork and wine glass, with the option to stack plates between courses, making the arrangement practical for family dinners.
- Formal tables involve multiple layers, including chargers, starter plates, and several flatware pieces, carefully positioned to avoid clutter and confusion.
- Proper spacing, low centerpieces, and early setup (especially for formal occasions) help maintain an inviting atmosphere and ensure easy conversation.
Table of Contents
- How to Set a Table: The Quick Checklist and Diagram
- Setting a Basic Table for Everyday Meals
- Setting a Casual Table for a Dinner Party
- Setting a Formal Table for Holidays and Special Occasions
- Considerations for Seating Arrangements and Place Cards
- Adapting Table Settings for Kids and Informal Gatherings
- Sources
- FAQ
How to Set a Table: The Quick Checklist and Diagram
Before you start rearranging silverware, run through this checklist. It covers what belongs in a basic setting, what a casual dinner adds, and what a formal table needs on top of that.
- Plate: centered on the placemat or charger, about a thumb’s width from the table edge.
- Napkin: left of the forks, or folded on top of the plate.
- Fork(s): left of the plate, salad fork (if used) on the outside.
- Knife: right of the plate, blade facing in.
- Spoon: right of the knife.
- Water glass: directly above the knife.
- Wine glass: right of the water glass, slightly lower.
- Bread plate: upper left, above the forks.
- Charger: under the dinner plate for formal or dressed-up settings.
Keep utensil bottoms flush with the bottom of the plate and line up glasses in a straight row. Set a basic table five minutes before you sit down; a dinner-party table deserves more lead time, which the sections below walk through.
Setting a Basic Table for Everyday Meals
A basic setting is the one you’ll use most, and it takes less than a minute once it’s automatic.
- Start with the foundation. Use a placemat or a bare tabletop, and center the dinner plate on it.
- Place the fork on the left. Set it directly left of the plate, tines up, resting on a napkin or beside it.
- Set the knife and spoon on the right. The knife goes closest to the plate with the blade turned inward, and the spoon sits to its right.
- Add the water glass. Place it above the knife, roughly where the blade tip points.
- Check your spacing. Leave about a thumb’s width between the plate and the table edge, and align the bottoms of the fork, knife, and plate so they form a clean line.
- Add extras only if you’re using them. A bread plate or cereal bowl can sit to the upper left, but skip it if it’s not part of the meal.
That’s the entire system. Everything else, casual dinners, holiday tables, layered courses, is this same setup with pieces added in a predictable order.
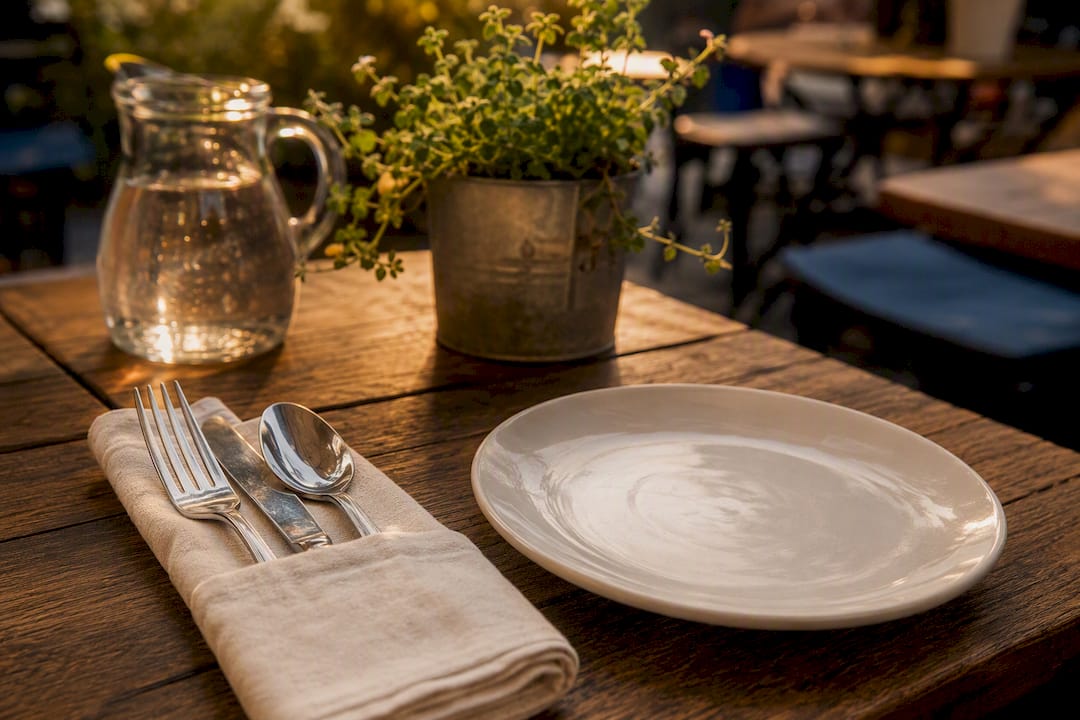
Pro Tip: If your table is tight on space, roll the fork, knife, and spoon together inside the folded napkin and set them as one unit to the left of the plate. It looks intentional, saves room, and is a common professional shortcut for small tables.
Setting a Casual Table for a Dinner Party
Hosting a friend or two for a two-course meal calls for a few deliberate additions, not a full overhaul.
- Build the basic setting first. Plate centered, fork left, knife and spoon right, water glass above the knife.
- Add a salad fork. Place it to the left of the dinner fork, on the outside, since it gets used first if salad opens the meal.
- Add a wine glass. Set it to the right of the water glass, angled slightly forward for easy reach.
- Choose chargers or placemats, not both. Pick one base layer so the table doesn’t look cluttered.
- Decide on the napkin’s home. Left of the forks works for a relaxed table; on the plate looks a little more polished without tipping into formal territory.
- Stack plates if courses are coming in sequence. A salad plate or shallow soup bowl can sit on top of the dinner plate and get cleared between courses.
This is the setting most home entertaining calls for. It signals effort without requiring a trip to a restaurant supply store, and every piece still earns its place at the table.
Setting a Formal Table for Holidays and Special Occasions
Formal settings intimidate people mostly because of volume, not complexity. Once you see the layering, it’s the same outside-in logic with more pieces.
- Set the charger first. Everything else builds on top of it, so center it before placing anything else.
- Stack starter plates. A soup bowl or salad plate goes on the charger if the meal opens with either course.
- Arrange flatware outside-in. Whatever gets used first sits farthest from the plate. A soup spoon, salad fork, and dinner fork might all appear on the left and right depending on the menu.
- Place the bread plate. It sits at the upper left, above the forks, with a butter knife laid diagonally across it.
- Line up the stemware. Water glass closest to the plate, white wine glass next, red wine glass to the right of that, all in a slight diagonal or straight row depending on your table’s width.
- Add dessert utensils last. Lay a dessert spoon and fork horizontally above the plate, or bring them out fresh with the dessert course.
Emily Post Institute recommends never setting more utensils than a meal actually requires, since the biggest formal-table mistake is clutter, not missing pieces. A crowded setting confuses guests more than a sparse one.
Pro Tip: Set your formal table one to two hours before guests arrive. That window gives you time to check every glass for smudges, straighten the flatware, and fix anything before the doorbell rings.
Spacing, Timing, and Centerpieces That Keep Dinner Sociable
A table can have every piece in the right place and still feel off if spacing and height are wrong. Keep place settings roughly a thumb’s width from the table edge, spaced evenly around the table, with glasses lined up above the knives rather than scattered at different depths.
Centerpieces belong at nose height or lower so guests can actually see and talk to each other across the table. For long tables, a row of small, low arrangements usually works better than one tall piece in the middle.
- Basic table: set it about five minutes before you sit down.
- Casual dinner party: give yourself around 30 minutes to add extra flatware and glassware.
- Formal meal: set the table one to two hours ahead so you have time for a final walk-through.
Pro Tip: Walk around the table once before guests arrive and check the sightline at seated height, not standing. What looks fine from above can block conversation once everyone sits down.
Common Table-Setting Mistakes and Fast Fixes
A few small errors show up again and again, and all of them take under a minute to fix.
- Unused utensils sitting on the table: pull them off rather than leave guests guessing what they’re for.
- Uneven flatware: line up the bottoms of forks, knives, and spoons with the bottom edge of the plate.
- Napkin buried under forks in a formal setting: move it to the plate or the far left, in clear view.
- Crooked glassware: nudge glasses back into a straight line above the knives.
Pro Tip: Remember it with a simple word match: “fork” has four letters and goes left; “knife” and “spoon” both have five letters and go right. It’s a small trick, but it sticks.
If plates don’t match, keep the same charger or placemat style across every seat. Uniform bases make mismatched dinnerware look like a deliberate choice instead of a gap in your collection.
Considerations for Seating Arrangements and Place Cards
Where people sit shapes the meal almost as much as what’s on the table. For small, casual gatherings, seating usually sorts itself out, but dinner parties and holiday meals benefit from a plan.
Put people who’ll enjoy talking to each other across from or beside one another, and separate anyone likely to clash over politics or old history. Hosts and guests of honor traditionally sit at the head of the table or the center of a long side, facing the entrance if possible.
Place cards earn their keep at tables of eight or more, or any event where guests don’t all know each other. A simple folded card with a first name, set just above the charger or on the napkin, removes the awkward shuffle of people hovering behind chairs. For a seated dinner with assigned courses, place cards also help servers keep track of any dietary requests tied to specific guests.
For smaller, more relaxed dinners, skip the formality and let people choose seats. Forcing place cards on six close friends around a kitchen table creates stiffness the occasion doesn’t need. Save the structure for gatherings large enough, or formal enough, that it actually solves a problem instead of adding one.
Adapting Table Settings for Kids and Informal Gatherings
Kids’ tables don’t need the same rules as the adult table, and trying to force full formal settings on children usually backfires. Stick to unbreakable plates, one fork, and a cup instead of a stemmed glass. Skip the knife entirely for younger kids, or swap it for a spreader if butter is involved.

For informal potlucks, backyard barbecues, or buffet-style meals, a full place setting is overkill. Set out a stack of plates, a cup holder of mixed forks and spoons, and let guests build their own setting as they move through the line. This is where the “only set what you’ll use” rule really pays off: nobody needs a soup spoon at a taco night.
Family-style dinners land somewhere in between. A basic setting per person, with serving utensils placed near the dishes rather than at each seat, keeps the table from turning into a maze of extra flatware nobody touches. If kids are eating alongside adults at a holiday table, consider a simplified version of the same setting everyone else has. It keeps the table looking cohesive without asking a seven-year-old to manage three forks.
How good tools make a good table setting easier
Consistent flatware and matching plates take the guesswork out of alignment. Wine Drop Cookery curates dinnerware and utensil sets built to line up cleanly, course after course, so hosts spend less time fussing with mismatched pieces and more time enjoying the meal. A coordinated flatware set is one of the simplest upgrades to a home table.
— Alan
Shop-Ready Picks That Make Table Setting Simple
Two purchases do most of the heavy lifting for any home table: a reliable flatware set and plates that work across basic, casual, and formal occasions. Get those right, and setting a table stops being a puzzle.

Wine Drop Cookery’s 18-piece flatware set covers dinner forks, dinner knives, and dessert spoons in one matched collection, so alignment and outside-in ordering happen automatically instead of requiring a drawer full of mismatched pieces. Pair it with the 9.5-inch white dinner plate, a neutral base that works under a charger for a holiday table or on its own for a Tuesday dinner. Both hold up to regular use without chipping or clouding, which matters more than most hosts expect once a set sees a few years of dinners. Browse the full essential kitchen tools collection to build out glassware, napkins, and serving pieces in one stop, and get your table ready before the next gathering lands on the calendar.
Quick Reminders Before Guests Sit Down
Keep these five points in mind and you’ll never freeze up staring at a bare table again.
- Follow outside-in: whatever gets used first goes farthest from the plate.
- Fork left, knife and spoon right, water glass above the knife.
- Set only the pieces you’ll actually use for the meal you’re serving.
- Napkin goes left of the forks or folded on the plate, never on the right.
- Keep centerpieces low so guests can see and talk across the table.
Walk the table once before anyone sits down and check that every setting is spaced evenly, glasses are in a straight line, and nothing is missing on one side that the other side has.
Where This Table-Setting Guidance Comes From
- Setting the Perfect Table — Escoffier
- Table-Setting Guides — Emily Post Institute
- Proper Table Setting — The Spruce
- How to Set a Table — Better Homes & Gardens
Sources
- Setting the perfect table — Escoffier
- Table-setting guides — Emily Post Institute
- Proper table setting — The Spruce
- How to set a table — Better Homes & Gardens
FAQ
Does the napkin go on the left or the right?
The napkin goes on the left of the forks or centered on the plate. Placing it to the right of the setting is not standard in traditional table-setting etiquette.
What are the five basic pieces in a table setting?
A basic setting includes a dinner plate, one fork, one knife, one spoon, and a water glass, arranged plate center, fork left, knife and spoon right, glass above the knife.
Do you set utensils to the left or right of the plate?
Forks go on the left, while knives and spoons go on the right, with the blade of the knife turned inward toward the plate.
When setting a table, where does the side plate go?
The bread or side plate sits at the upper left of the setting, just above the forks, often with a small butter knife laid across it.
How far in advance should I set a formal table?
Set a formal table one to two hours before guests arrive, which leaves time to check glassware, straighten flatware, and fix any last-minute issues.
0 comments